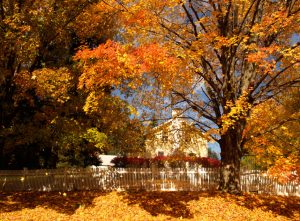
Fall is a magical time of year, with its cool crisp air, vibrant autumn leaves, and rich hues of red, yellow, and orange. If you’re a photographer, autumn is the perfect time to capture those stunning fall colors in all their glory. In this guide, we’ll explore the best tips and techniques for photographing fall colors like a pro.

Scouting for the Best Locations
When it comes to photographing fall colors, location is everything. Check out websites and social media feeds for inspiration on the best locations to capture fall colors. Popular fall color spots include deciduous forests, parks, and hiking trails. Be on the lookout for locations that offer a variety of color and texture.
Preparing Your Camera
Make sure your camera is in tip-top shape before heading out to capture fall colors. Here are a few essentials to check:
Clean your lens: A clean lens is crucial for capturing clear, vibrant images.
Set your camera settings: In most cases, manual mode is recommended for fall color photography. This allows you to adjust shutter speed, aperture, and ISO to get the perfect exposure.
Choose a fast shutter speed: To freeze the action of falling leaves, choose a shutter speed of at least 1/500th of a second.
Use a tripod: A tripod will help stabilize your camera and ensure sharp images.
Angle and Perspective
The angle and perspective you choose can greatly impact the way fall colors are presented in your images. Try shooting from different angles, such as above, below, or at eye level. You can also experiment with using a bird’s-eye view by shooting from a high vantage point to capture the vastness of the fall colors.
Composition and Framing
Composition and framing are essential for creating impactful images. Here are some tips:
Rule of thirds: Use the rule of thirds to frame your image by placing important elements at the intersection of vertical and horizontal lines.
Leading lines: Use leading lines to guide the viewer’s eye into the frame. For example, a path or river can lead the viewer into the scene.
Negative space: Leave some negative space in your image to create a sense of harmony and balance. Negative space can be any non-colorful element such as blue sky or white clouds.
Lighting and Shade
Fall colors are at their peak during sunny days with plenty of natural light. However, be mindful of direct sunlight, which can cause glare and washed-out colors. Try positioning yourself in the shade or shooting at an angle to avoid direct sunlight. Early morning and late afternoon are usually the best times for lighting conditions in fall color photography.
Post-Processing
Even the best images need a little help in post-processing to bring out their true potential. Use image editing software to enhance color saturation, contrast, and overall vibrancy of your fall color images. You can also experiment with filters and other effects to create unique and personalized fall color images.
In conclusion, photographing fall colors is all about being at the right place at the right time with your camera ready to capture the beauty of nature. With this guide, you should have all the essentials covered for capturing stunning fall color images that will last a lifetime. Enjoy!
